Building a Concert Ticket Alert App with NodeScript

The challenge
Have you ever experienced the feeling of disappointment when you discover that your favorite artist or band was playing 2 towns over, and you missed it? I have had this happen and it is devastating. “I wish I had known that <band name> was playing. I would totally have gone.” What if you could build an application that alerts you to your favorite artists having a concert nearby — before the show — so you can be sure to get tickets and see them live? Even if you don’t know how to program?
In this post, we’re going to build a no-code concert ticket alerting application using NodeScript. This app will regularly scan Ticketmaster.com for your favorite artists, and will tell you (via Slack) if a concert is happening nearby!
Ready to go? Let’s do it!
Getting started
Before we can build our app, we need accounts with a few different services.
- Google. You probably have a google account already. We’re going to use Google sheets to list all our favorite artists
- Ticketmaster. Sign up for a free api key. This is how we retrive concert data.
- Slack: If you do not already use Slack, you’ll need to sign up.
- NodeScript: NodeScript is the low code solution we’ll use to wire all of the pieces together to build our concert alert app.
Assembling the pieces:
Google Sheet
- Create a new Spreadsheet by visiting https://sheets.new, or make a copy of the sample Concert Finder Sheet
- This sheet has a few named ranges to identify where data can be placed.
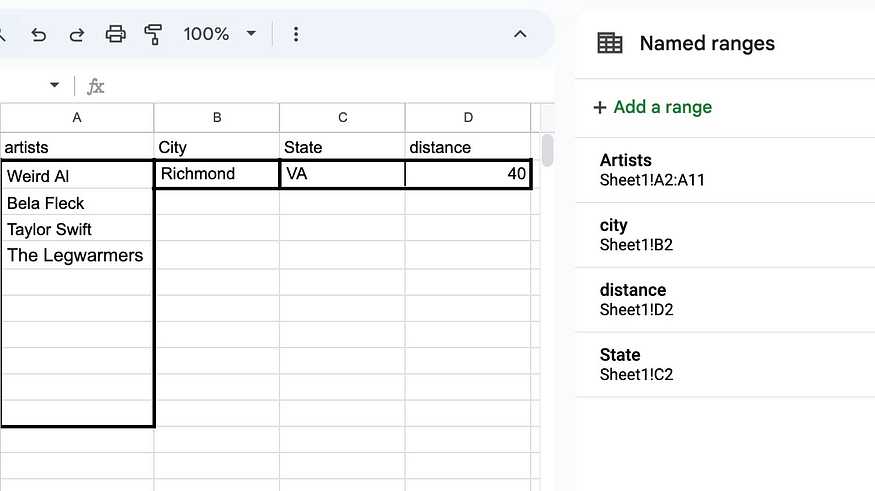
3. The use of named ranges will help us identify the fields we will use to query Ticketmaster for concert data
- Artists: the names of the bands
- City
- State
- Distance: This is a US app, so this will default to miles.
For our non-US readers, the city/state values might need to be changed for your country. In this app we will hardcode in the units- and you can use miles or km.
Ticketmaster.
The Ticketmaster event API is built using URL parameters. This means that all of the search criteria are placed in the URL string. For example, to see if Weird Al Yankovic is playing near Richmond Virginia, we would use the following URL:
https://app.ticketmaster.com/discovery/v2/events?apikey=<apikey>&keyword=Weird%20Al&locale=*&city=Richmond&countryCode=US&stateCode=VA&radius=40&unit=miles
The base URL is `https://app.ticketmaster.com/discovery/v2/events` which says, ‘I want to ask the discovery events’ endpoint a question. Everything after the question mark are part of the search criteria. Each parameter is followed by an &. Think of this as “I’d like a burger & fries & a coke”. It tells the API that you have a lot of things you are asking for.
- apikey=<apikey>: This is the API key from TicketMaster. I am not showing my API key here, as it needs to be kept secure.
- keyword=Weird%20Al: The keyword we are searching for, In this application, we are using artist names for the keyword. The %20 is “URL speak” for space. Don’t worry about that (or other parameters in URLs), the code will take care of these tasks for us.
- city=Richmond: The city.
- state=VA: The state.
- radius=100: How far away from the city you’ll go for the show
- units=miles: The units on the radius. (km is a valid entry here for everyone not in the US/UK.)
When you access this URL, a response comes back in JSON format with details about the concert. We’ll use NodeScript to parse the results and send them to Slack.
Slack
You will need a Slack Workspace (if you are not already a part of one.)
Next, visit https://api.slack.com/apps to create an app.
- Create from Scratch
- I named my app music_alert, and added it to my new workspace “music alerts.”

3. Click App Home and Add Scopes:

4. Add “chat:write”:

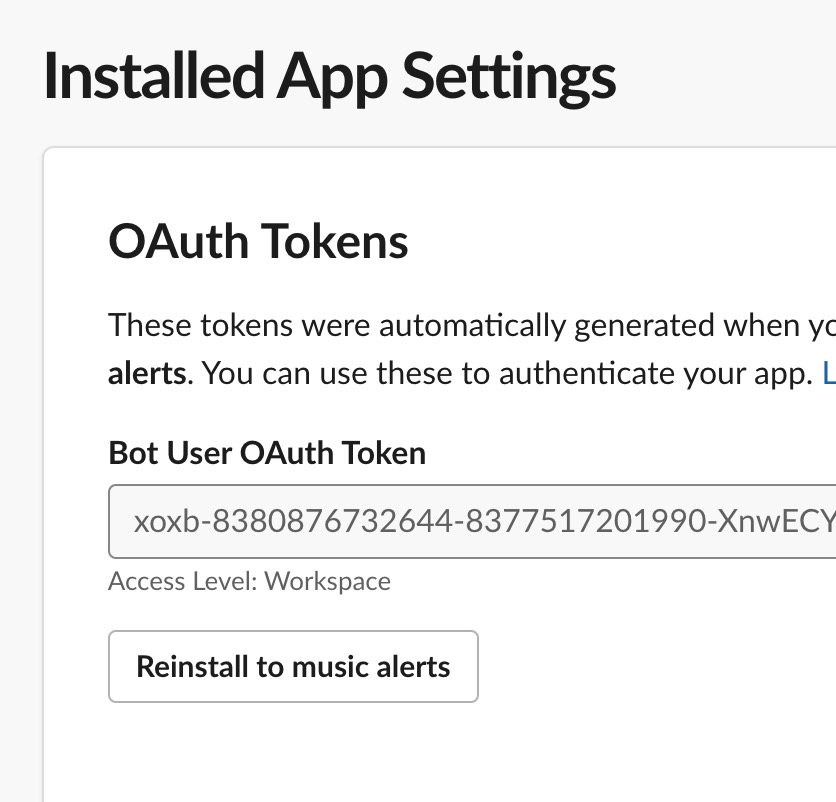
5. Now you can click “Install App” and install the app. You’ll be given a token that we will use later. It too should be kept secret, hence the screenshot cutting off half of the text:
6. Invite your music_alert bot to the channel you’d like alerts delivered to:
Building the application with NodeScript
Now that we have created all of the pieces, we are ready to build our application. To assemble them into our concert alerting application, we will use NodeScript — a no-code tool. NodeScript uses Nodes and wires to connect data in order to create an application.
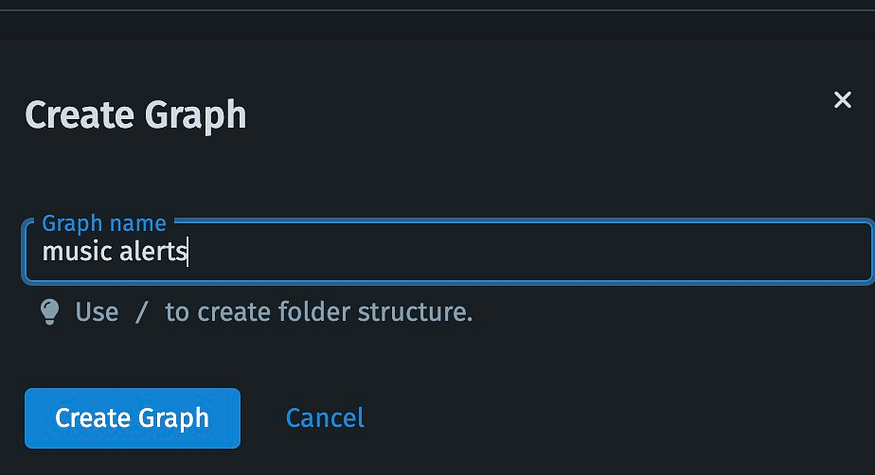
- Create a graph:
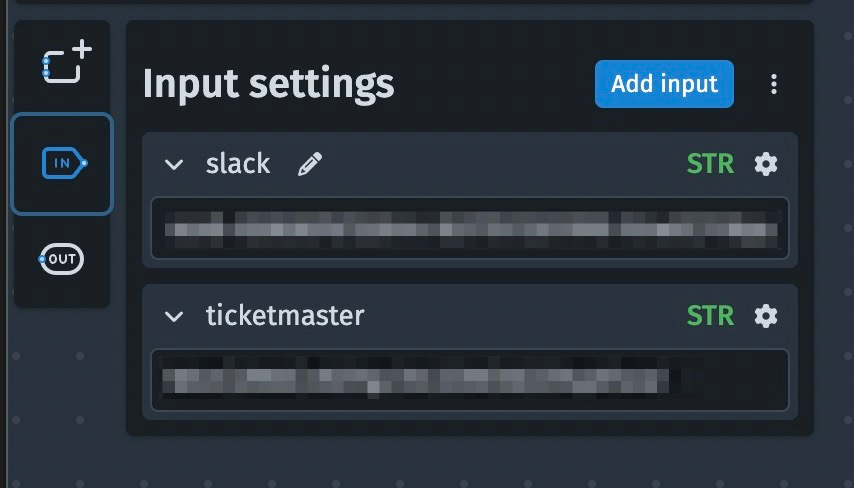
2. Once the graph is created, you’ll land on a blank canvas. This is where we will create our application. In the upper left are buttons that help organize and create nodes. The middle button is called inputs. Click that button, and create two inputs for your Slack and Ticketmaster codes. They are both strings. In the screenshot below the actual values are blurred as they should remain private.
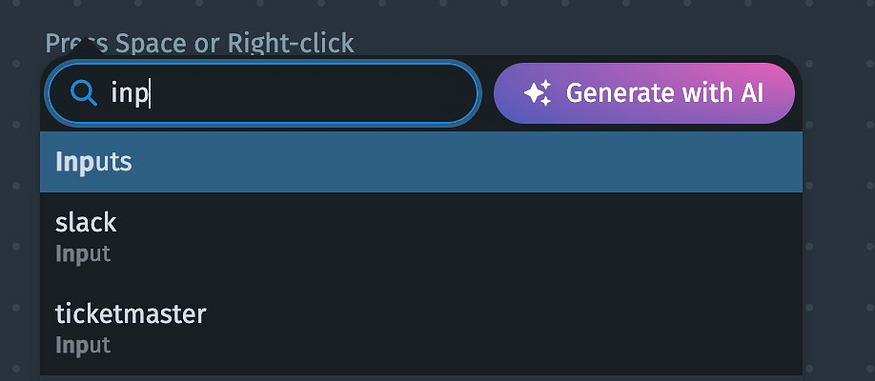
3. Right click on the canvas to add a node. Search for inputs, and see that the Slack and ticketmaster inputs are ready to go.
4. We will come back to these in a moment. Let’s add Google Sheets now:
5. Click

6. Search for Google Sheets. We want to add “Google Sheets/Values/Batch/Add.” Click, and add this node to the graph. Congrats, You’ve added your first node to the graph!
```
Aside:
Working with Nodes.

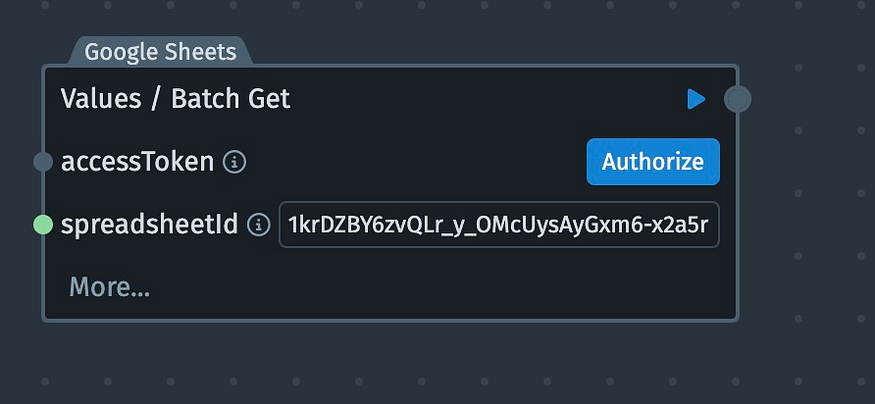
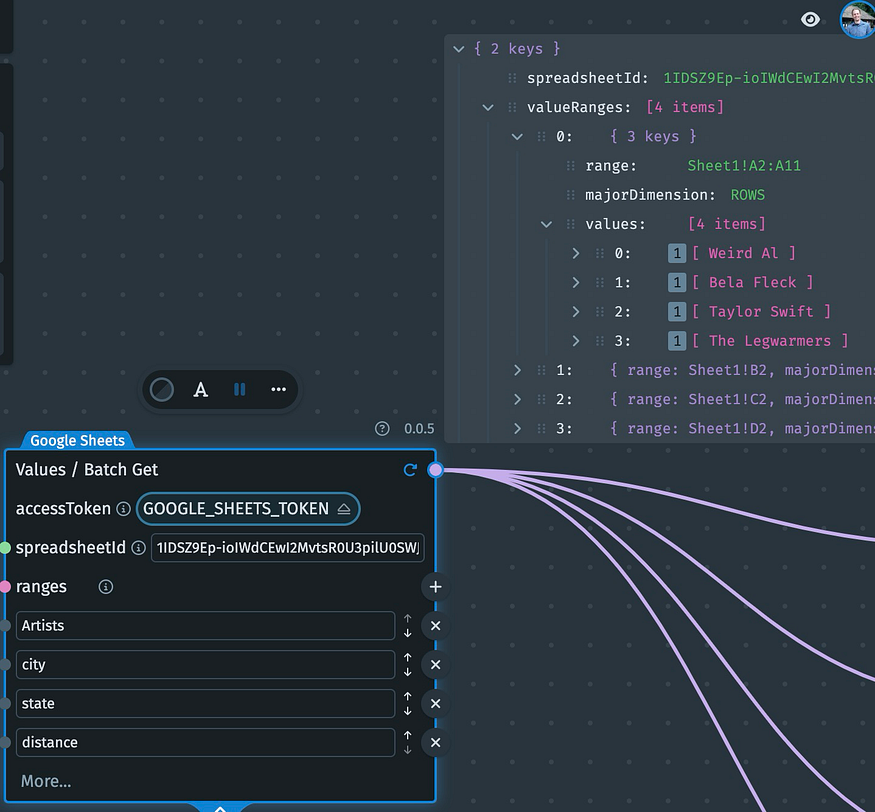
Nodes are used to process data in different ways. This Google Sheets Get will pull data from a Google Sheets doc. There are 2 inputs
- accessToken
- spreadsheetId.
Let’s add the spreadsheetId first. The spreadsheetId can be found in the URL of the Google Sheet: `https://docs.google.com/spreadsheets/d/1IDSZ9Ep-ioIWdCEwI2MvtsR0U3pilU0SWJIARol3lNM/edit?pli=1&gid=0#gid=0.`
To add the spreadsheetId, we have two options.
- Add a String Input Node (renamed to spreadsheetId in the screenshot), and paste in the value. Then connect the output of the String input to the spreadsheetId node. This action takes the output of the spreadsheetId Node and feeds it into the input of the Values/Batch/Get Node.
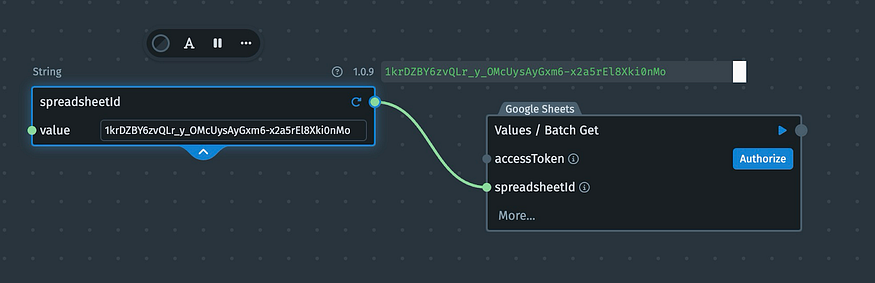
2. Alternatively, you can “hardcode” the value in the text box.
Both work the same way — telling the Node what the value of the SpreadsheetId is.
To add the accessToken, click the authorize button to add the token.
Next, click more in the bottom right. add 4 Range fields. We will hard code the values “Artists”, “city”, “state” and “range.” These range inputs tell the Node to extract these ranges from the Google Sheet.
Pressing the “play” button reveals the output of the Node. In this case we see a large array (with the artist section expanded
```
We now have our first NodeScript node running, and accurately extracting our spreadsheet data.
Congrats on finishing your first NodeScript Node!
```
Processing the data
Now that we have pulled our artist and location data from the Google Sheet, we must send this data to Ticketmaster.
To extract the exact values for Ticketmaster, we must do some data transformations:
We use 4 get Object files to extract the desired strings from the JSON:

The artists is an array of artist names, and the city, state and distances all show a unique value.
Web request
Now we are ready to make a Web request to Ticketmaster. The Web HTTP Request Node will build the URL we need automatically.
Add the Node, and add 6 query parameters. The names are shown in the screenshot.

We also create a String node, rename it base url and insert the base URL for the Ticketmaster API (everything before the question mark). We add the ticketmasterapi input node (this holds our secret API key).
Then we wire the artist, city, state and radius objects into the correct query fields.
A special Case
There are multiple artists that we wish to query. This means that the HTTP request should be run once for each entry in the artists array. To make this happen, click on the keyword input field, and turn on “Expand.”

Now, the web request node will run one time for each value fed into the keyword field. Looking at the first screenshot, we see that the output has 4 entries — indicating that this API was run 4 times — once for each artist that was extracted from the Google Sheet.
Parsing the API data to send to Slack
Now that we have concert data from Ticketmaster, we need to extract the concert data. This information is stored in the body of the response. Expanding the first two entries, we can see partial view of the body:

The first entry has an “events” value, and we see the artist’s name “Weird Al”. The second entry does not have this field. Expanding the data, we see that “number” = 0. This means that there are no events for Bela Fleck.
Of course, for a concert alerting app, we only want to alert for artists that have concerts nearby. So we need to remove any entries that do not have any concert data.
We do this through a series of Nodes:

- We convert the output to parse JSON
- From the JSON, we extract all of the body objects.
- In each body object, we look at page.totalPages, and look at the number.
- If the totalPages >0, then there is a concert.
- The resulting array shows T, F, F, T — we have two concerts that need to be announced.
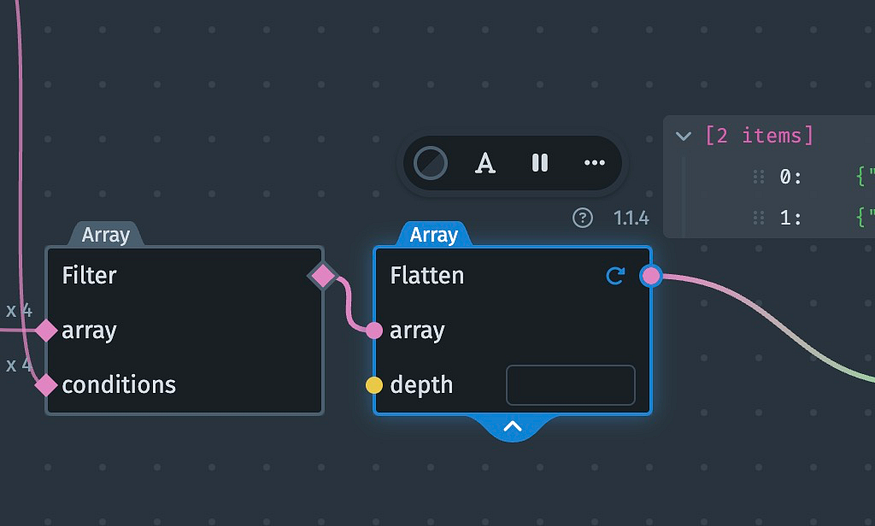
Now, with this data, we can extract the rows that have concert data using array functions.
- Filter the array using the conditions we just extracted. The filter uses the T/F values to remove any values that do not have a concert.

2. Flatten this array (remove any empty values). The array now just has two entries — the artists with concerts nearby! We are now in the home stretch.
Send the data to Slack
Now that we have isolated the artists who have concerts nearby, we are ready to send the data to Slack.
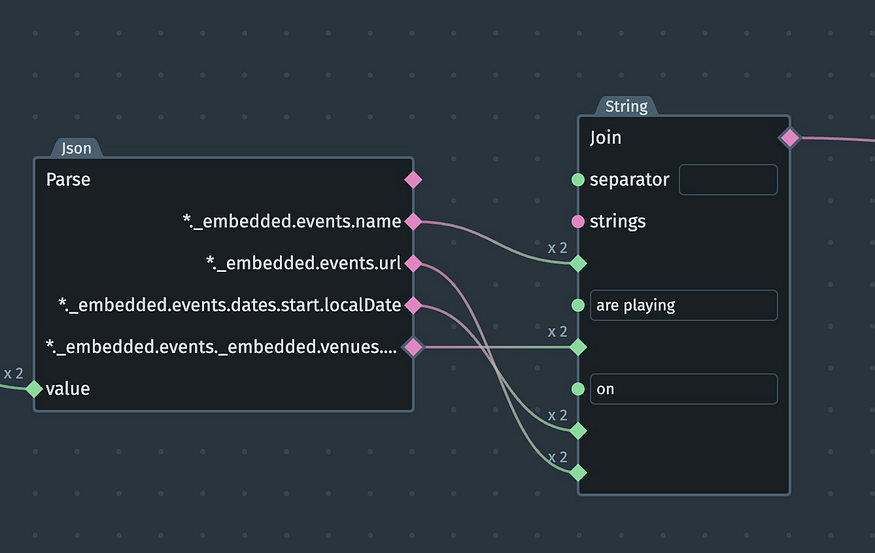
- Extract the values we wish to send using the JSON parse Node. The text should read “{artists} are playing {venue} on {date}. {url}” .
- The first node extracts the values needed for this sentence.
- The String Join connects them back into a sentence, with the hard coded ‘filler text.’
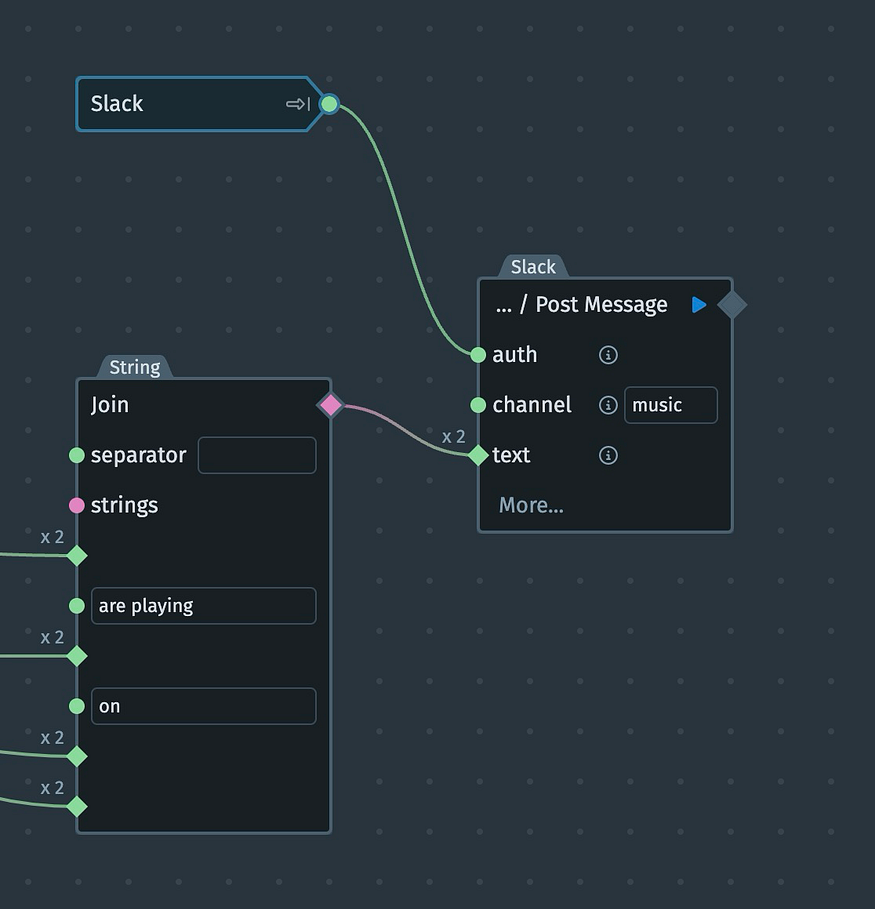
4. The Post message to Slack node has three inputs:
- Auth: Add The Input Node with your Slack credentials in them
- Channel: “music”
- Text: The sentence we created.
5. When we run the NodeScript application, we receive the following messages in Slack. Our application is completed!

Publishing and automating our application
With a working graph, we can click publish. Once published, in the NoseScript dashboard, click schedule:

What better way to start off your Wednesday than to learn about concerts in your area?
Using the application
Simply edit the Google Sheet as desired, whenever you wish. Every Wednesday at 12 UTC, the NodeScript application will run, and Slack notifications will appear about any upcoming concerts! You’ll never miss the big show again.
Summary
In this tutorial, we used NodeScript to connect a Google Sheet with artist data to Ticketmaster — to check for any nearby concerts. If any concerts are found, we send an alert via Slack. Thi application is scheduled to run weekly, announcing all nearby shows to those who are interested.
NodeScript is an easy to use, drag and drop application builder. You do not need to develop a server to contain and deliver your code — that is automatic with your NodeScript application. With NodeScript you can easily build and configure applications, API endpoints — anything you might imagine, using no-code and low-code techniques.
If you are interested in learning more you can sign up to NodeScript for free!